S1 / 01
Read before use
The device provides driver assistance only; it does not replace road signs, traffic laws, the vehicle's instruments, or the driver's judgement.
 Choose a secure position that keeps your view, airbags and vehicle controls clear.
Complete setup while safely parked.
Park first. Set up once.
Finish installation and connection before you start driving.
- Keep the road and instruments visible.
- Keep airbags and vehicle controls clear.
- Check that the device is secure.
Full instructions
This manual explains how to install and connect the Drivona S1, understand its LED and sound signals, report hazards with the buttons, configure alerts, and use the product safely. Read this manual in full before use and keep it for future reference. The device provides driver assistance only; it does not replace road signs, traffic laws, the vehicle's instruments, or the driver's judgement.
S1 / 02
Product overview
The device communicates with the app via BLE; it does not measure speed limits and is not a radar detector.
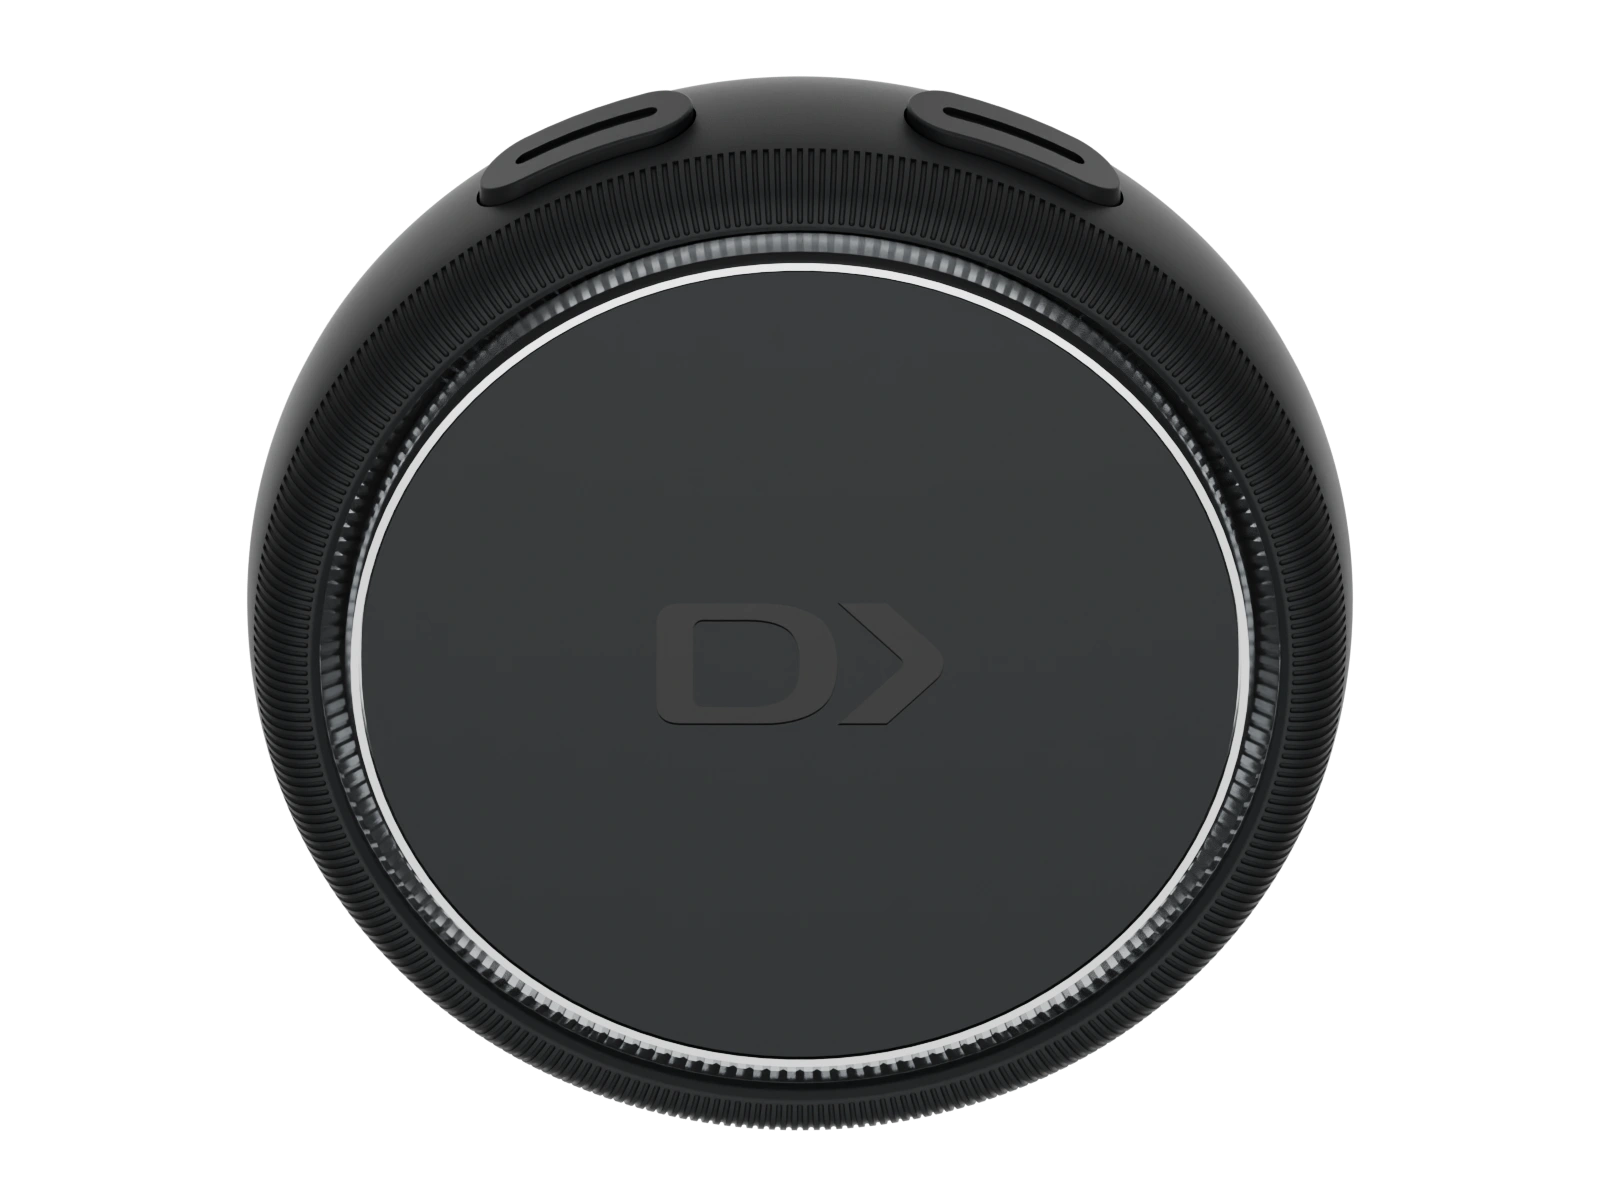
Meet your device
Front facing you. Left and right follow your view.
Select a part to see its position and function.
Hold for 5–7 seconds to switch on. Tap once to report an incorrect or cleared alert.
Full instructions
The Drivona S1 is an in-car device that provides live traffic, speed-camera, road-safety, and speeding alerts. It communicates with the Drivona app via Bluetooth Low Energy (BLE). Alert data, road speed limits, vehicle location, and speed information are supplied by the phone. The device does not measure the road speed limit itself and is not a radar detector. The S1 has no display and communicates information through the full LED ring and audible signals.
Data powered by SCDB.info & Blitzer.de®
S1 / 03
Package contents
If the device or any accessory is damaged or missing, do not use the product. Contact the retailer or customer support.
Choose your mounting method
Mount details
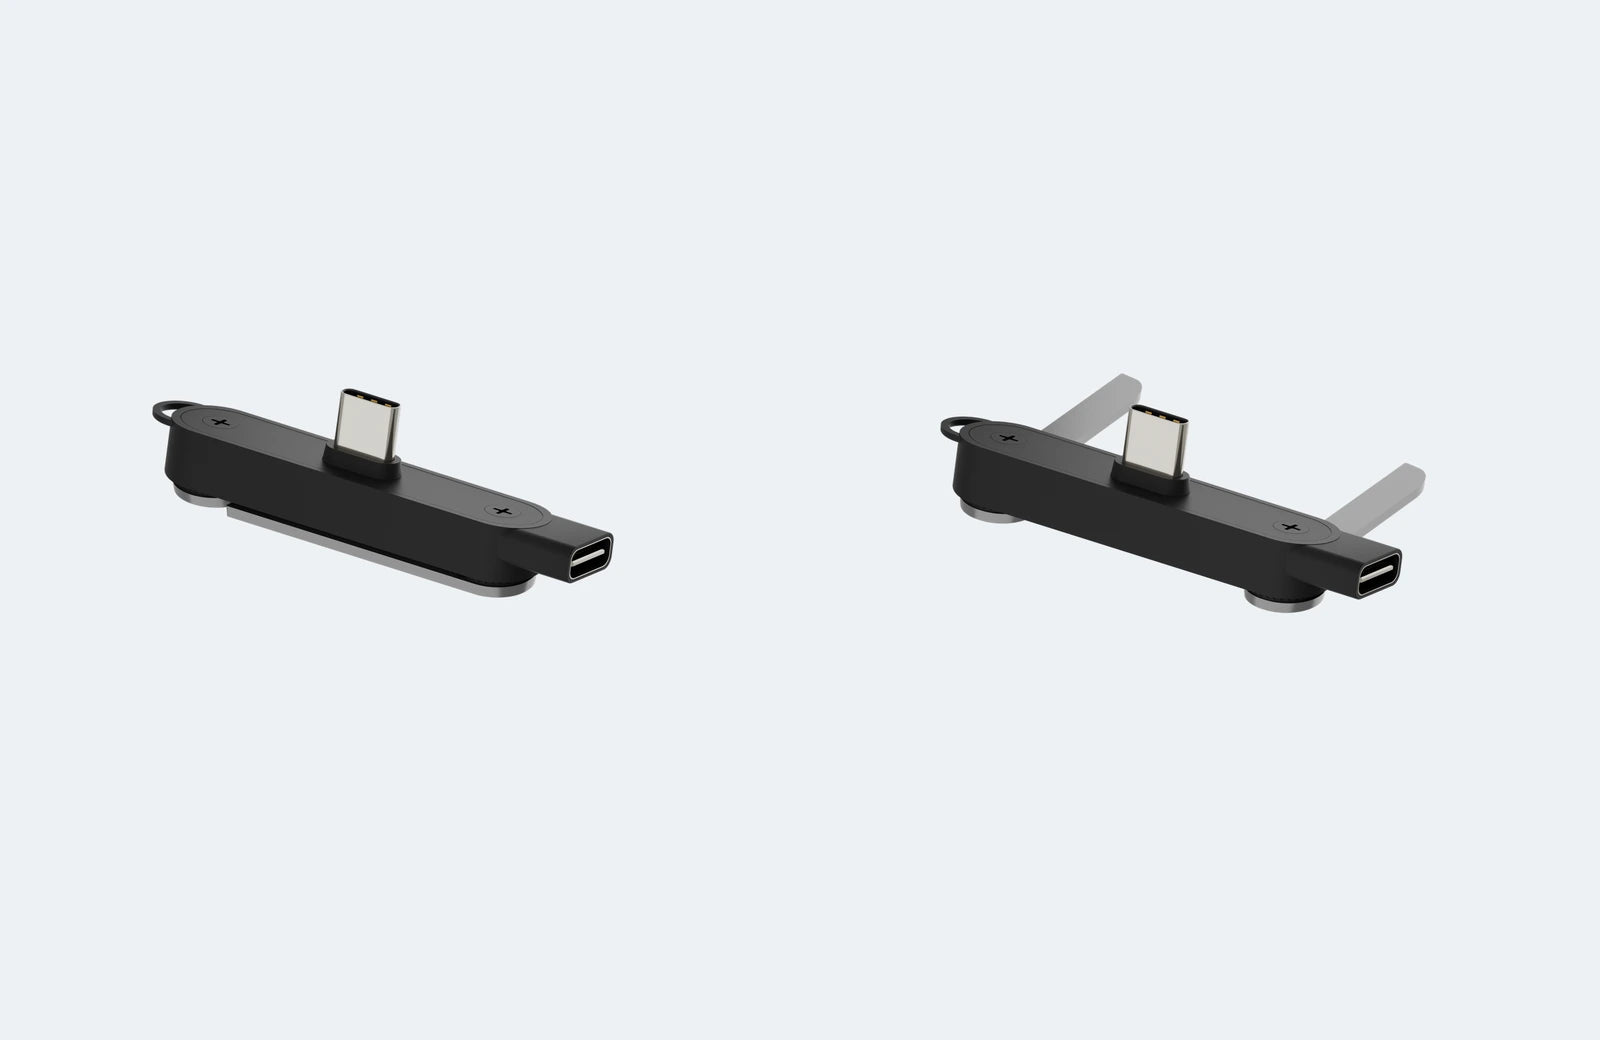 Unfold the supports
 Mount socket
For included accessories, see Package contents.
Full instructions
- 1 × Drivona S1 device.
- 1 × dashboard charging mount.
- 1 × 1 m data cable with adapter.
- 2 pairs of magnetic adhesive pads.
If the device or any accessory is damaged or missing, do not use the product. Contact the retailer or customer support. Charge the device before first use.
S1 / 04
First-time setup
Complete these 7 steps: charge, install the app, grant permissions, power on, pair, mount, and check before setting off.
Dashboard mount / visual guide
Connect it, step by step.
Work while safely parked. Select a step to inspect the connection before you fit it.
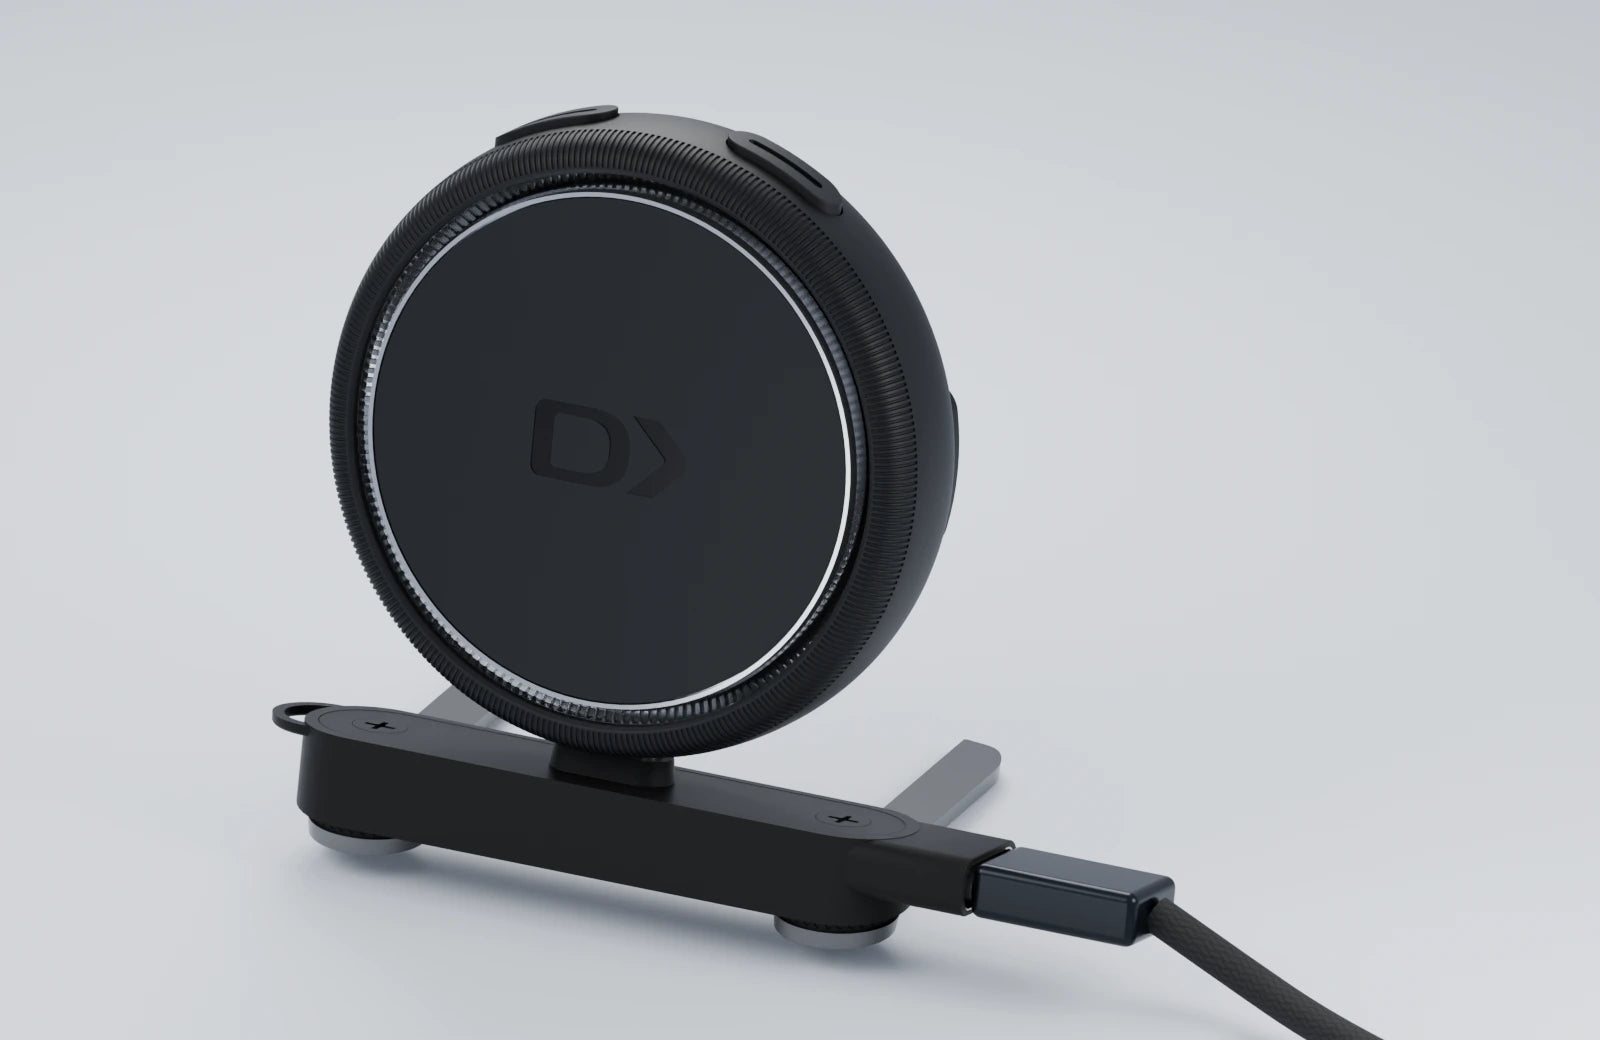
Unfold the supports
Open both support feet before fitting the device. The left view shows the folded mount; the right view shows it unfolded.
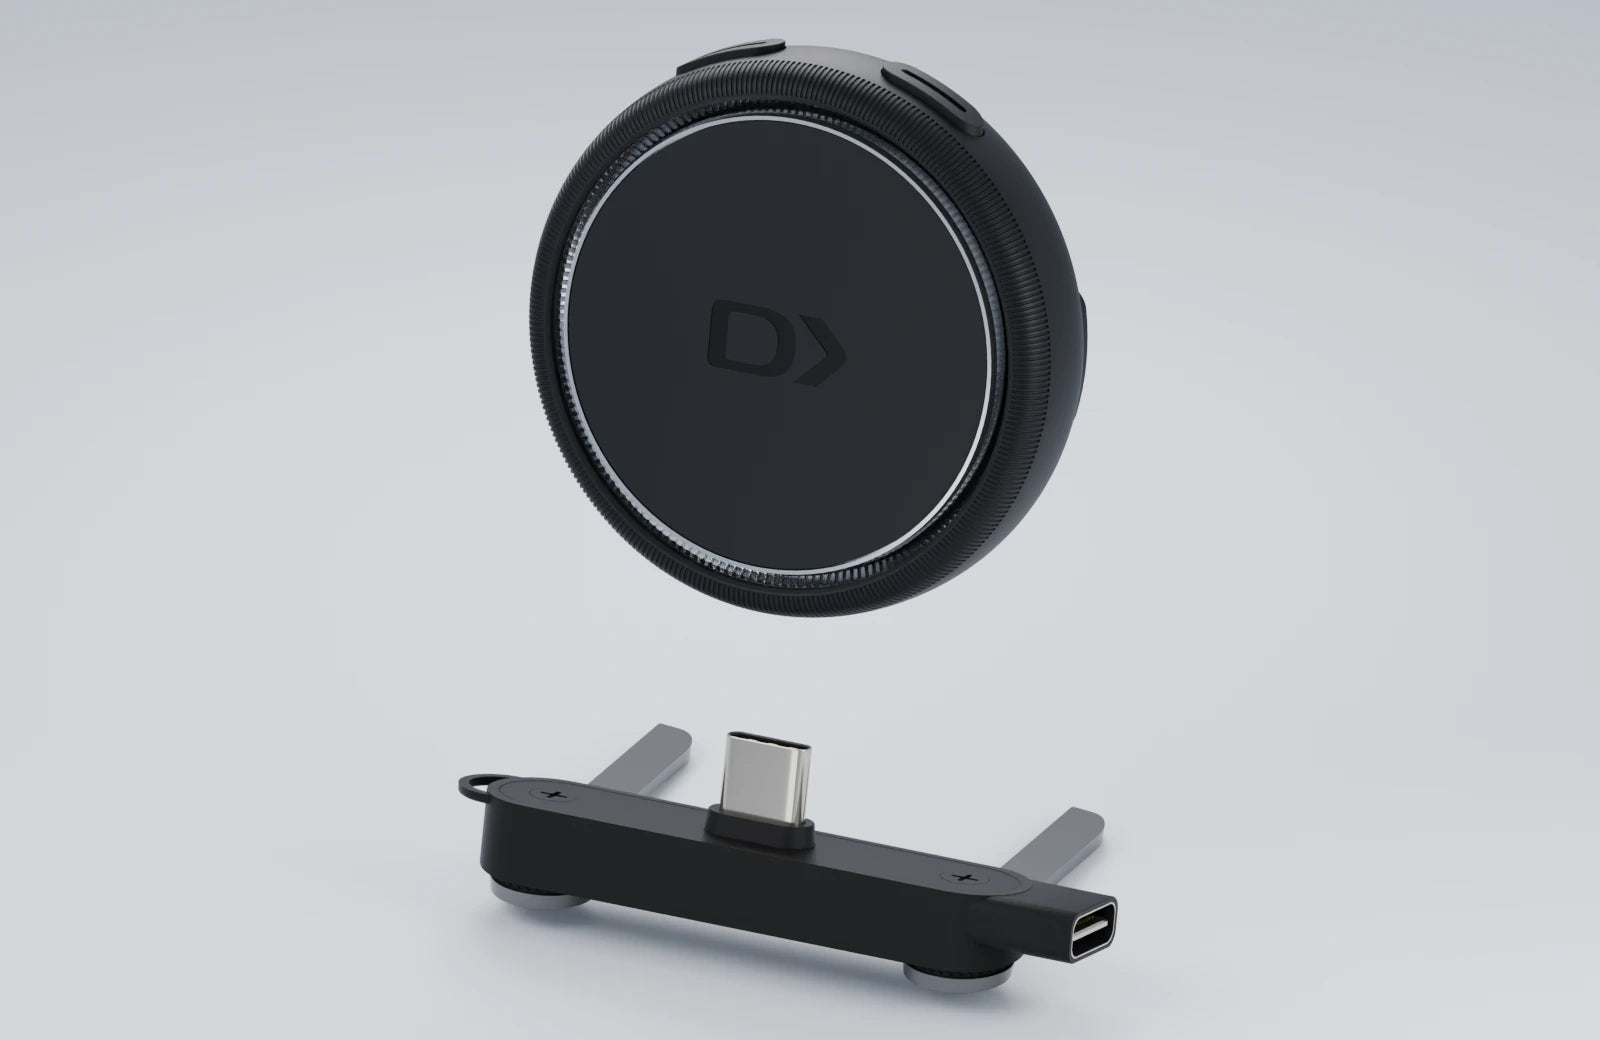
Align the device
Steady the mount. Line up the device socket with the upright connector, then bring them together along the connector axis. Do not tilt or force the connection.
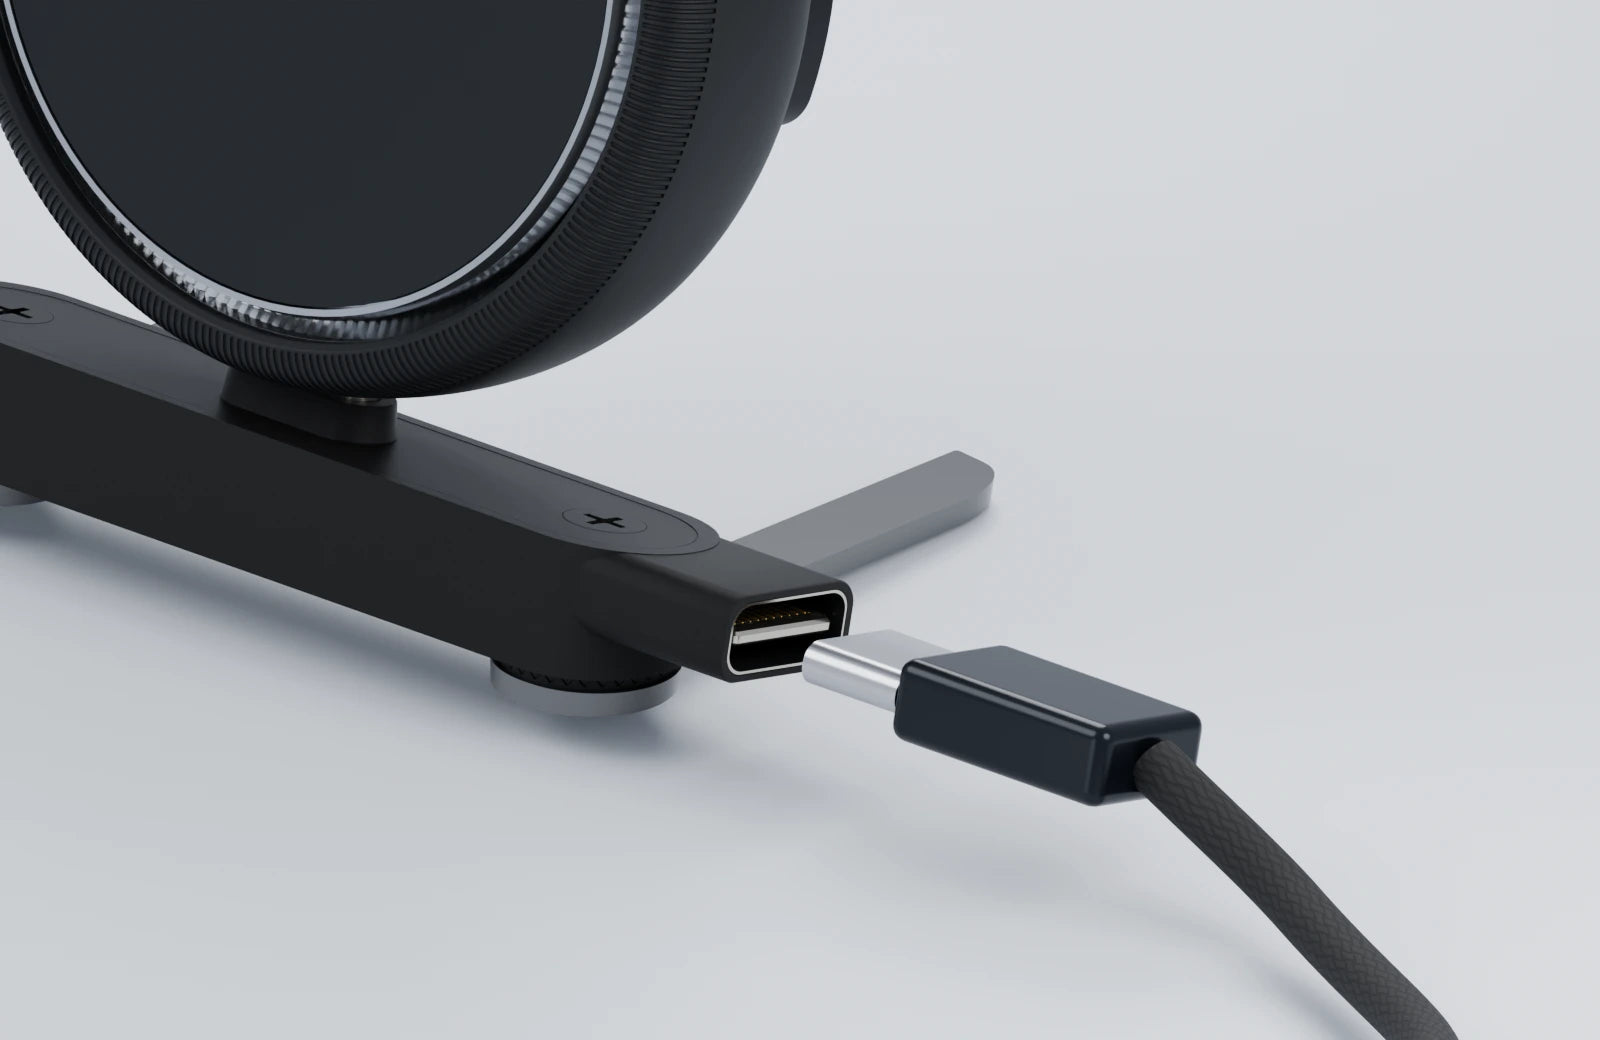
Connect the cable
Align the USB-C plug with the socket on the side of the mount. Insert straight along the socket axis; do not push it in at an angle.
Check the assembly
Check that the device sits securely and the connection is not under strain. Route the cable clear of controls. Mounting alone does not confirm an app or location connection.
S1 / MOUNT
Docking, up close.
Compare the device and dashboard mount before and after assembly.
Your setup, in seven steps
Setup checklist
Choose your mounting method
S1 / 05
Magnetic adhesive pads
Choose the position before bonding. Leave the pads on the mounting surface when removing the device for everyday use.
 Magnetic attachment points on the back
- 01
Clean the mounting surface and let it dry.
- 02
Align the pads with both rear contacts; peel and press firmly.
- 03
Let the adhesive bond before attaching. Leave the pads in place when removing the device.
Detailed steps
Test the position
Park safely. Match the supplied pads to the magnetic attachment positions on the back of the device and test the intended location without peeling the backing. Keep the buttons accessible, the light ring visible and the S2 screen readable.
Clean and dry
Choose a firm, flat surface suitable for adhesive. Remove dust and grease and let it dry completely. Avoid soft, peeling, waxy or strongly curved surfaces.
Align and bond
Once position and orientation are correct, remove the backing from the adhesive facing the mounting surface. Keep the pads aligned with the device and press evenly. Allow the bonding time specified with the pads before loading them.
Attach and check
After the bond has set, align the back of the device with the pads. Check for full contact, not just contact at an edge. Support the device and test gently: neither the pads nor the device should slip or come loose.
Full instructions
Remove and refit
Support the surface beside the pads with one hand and hold the device housing with the other. Gently separate the magnetic connection. Do not pull a cable or repeatedly peel the adhesive to remove the device. Realign and check the fit whenever you refit it.
Before you drive
- Keep the road view, instruments, airbags and vehicle controls clear.
- Check that adhesive edges are not lifting and button presses do not move the device.
- Install, remove and adjust only while safely parked.
S1 / 06
Connection and in-car display
While driving, Bluetooth, Location Services, and a data connection must remain enabled, and the app must be allowed to run in the background.
Your phone connects the experience.
Device, phone and in-car display
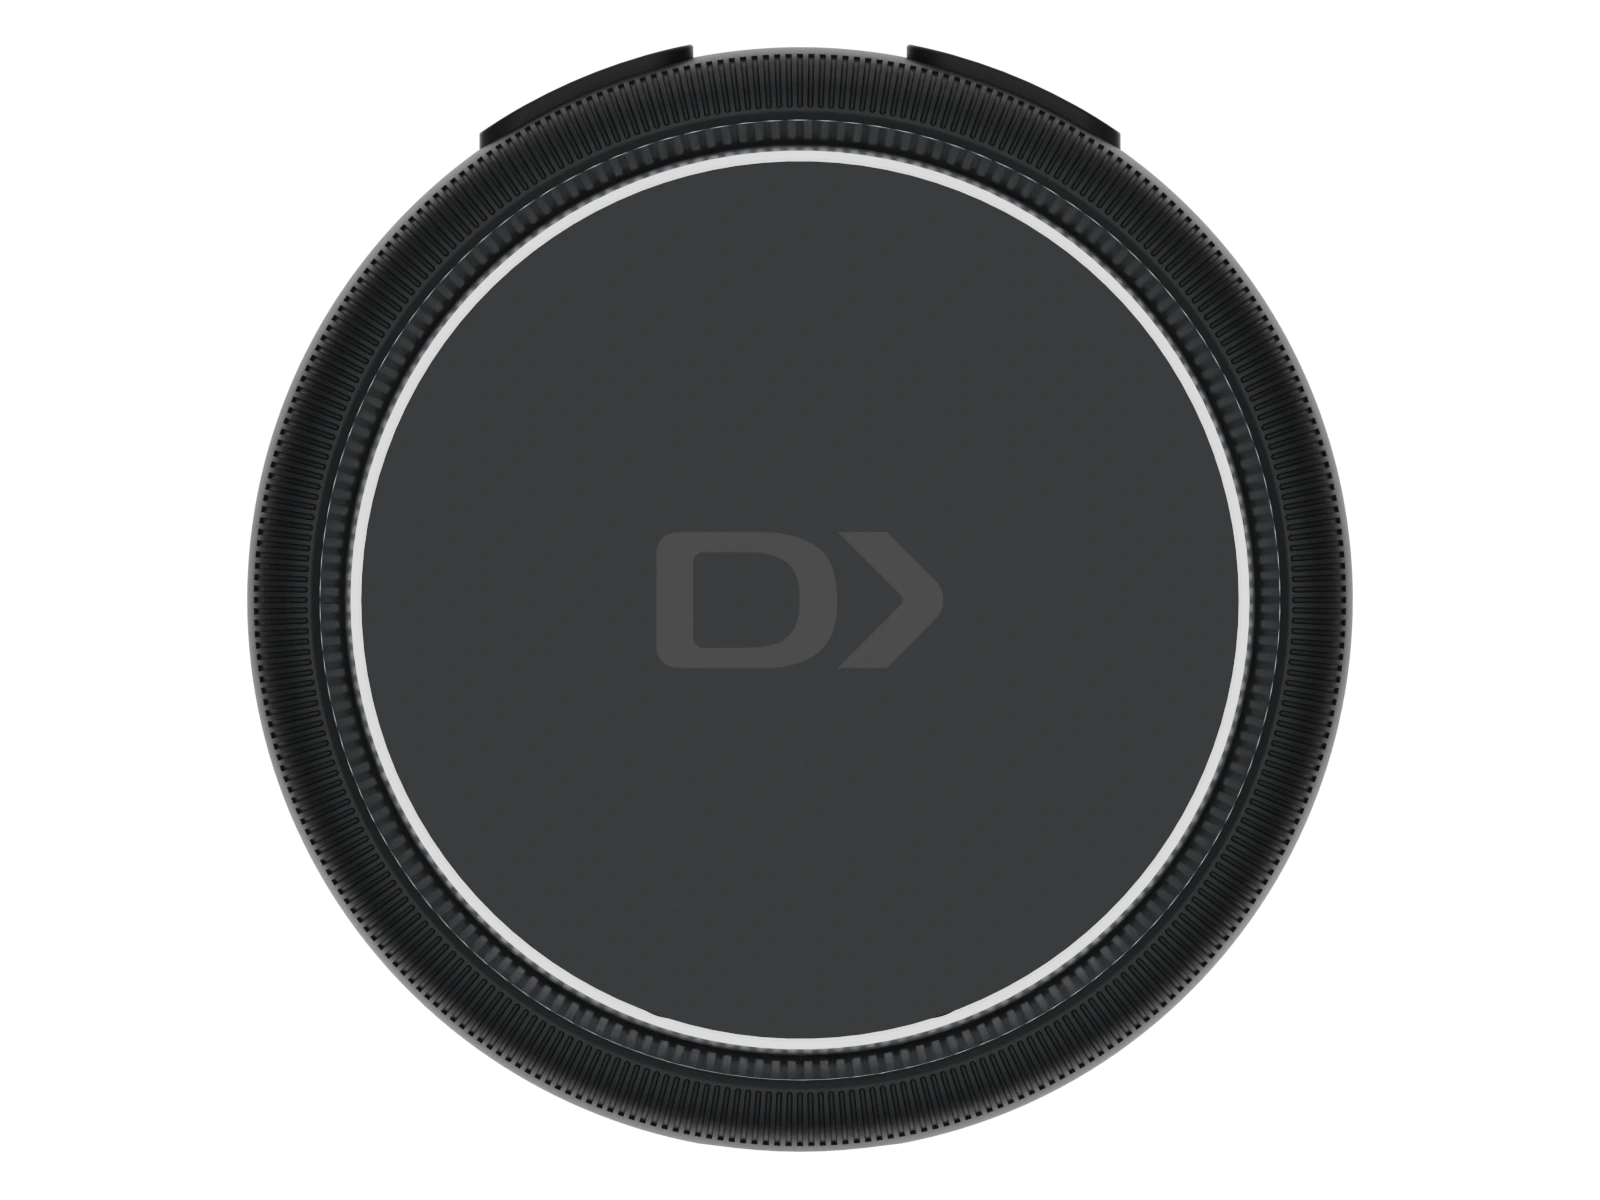
S1
Compatible car display
CarPlay / Android Auto
Optional · supported vehiclesKeep these available on your phone
- ✓Bluetooth
- ✓Location
- ✓Mobile data
- ✓Background access
CarPlay / Android Auto availability depends on the phone, vehicle, app, region and local rules. The device is not shown as connecting directly to the car display.
Full instructions
While driving, Bluetooth, Location Services, and a data connection must remain enabled, and the Drivona app must be allowed to run in the background. If the phone's power-saving mode restricts location or Bluetooth, exempt the app from battery optimisation and allow unrestricted background activity.
The S1 supports Apple CarPlay and Android Auto through the phone app. When the phone is connected to a compatible vehicle system, supported map navigation, alert viewing, and hazard-reporting functions can be used on the in-car display. Availability depends on the phone, vehicle, app version, region, and local regulations.
S1 / 07
Button controls
With the front of the device facing you, the button on the left is the left button and the button on the right is the right button.
Find the right gesture
LR Left and right are viewed from the front of the device.Choose an operation to highlight the correct button.
Full instructions
- Press and hold the left button for about 5–7 seconds: switch the device on.
- Press and hold the right button for about 5–7 seconds: switch the device off.
- Press the left button once: report that the current alert is incorrect or the hazard is no longer present.
- Press the right button once: confirm that the current alert is correct and the hazard is still present.
- Press the left button twice: report a missing mobile speed camera.
- Press the right button twice: report a missing fixed speed camera.
- Press the left and right buttons together: report a missing road hazard.
S1 / 08
LED and sound signals
The full LED ring uses colour and flash count to indicate status and alerts, together with sound signals.
Light signals
This page does not play sound. Repeating signals play for two cycles; select a state to replay.
Full instructions
Device asleep or switched off: LEDs off; no sound.
- Device switched on or woken with a button: the full ring flashes green once; the power-on tone sounds once.
- Manual power-off or automatic sleep: the full ring flashes white once; the power-off tone sounds once.
- Device added to the app and paired for the first time: a green chase light travels once around the ring; the pairing tone sounds once.
- Connected device removed in the app: a white chase light travels once around the ring; the disconnect tone sounds once.
- Device on, not connected to the app, battery normal: green chase light.
- Device connected to the app, battery normal: the full ring flashes green once every 4 seconds.
- Device on, not connected to the app, battery low: the full ring flashes red once every 4 seconds; the low-battery tone sounds once with each flash.
- Device connected to the app, battery low: the full ring flashes red once every 4 seconds; the low-battery tone sounds once with each flash.
- Fixed or mobile speed-camera alert: the full ring flashes blue 3 times; the warning tone sounds 3 times.
- Traffic accident, roadworks, broken-down vehicle, or other road-safety alert: the full ring flashes yellow 3 times; the warning tone sounds 3 times.
- Vehicle reaches the speeding-alert threshold: the full ring flashes red 3 times; the warning tone sounds 3 times.
These are the full-ring LED alert signals.
S1 / 09
Sleep, wake, and power-off
After the vehicle has been stationary for about 5 minutes, the device enters sleep automatically; it wakes when the vehicle moves again or a button is pressed.
S1 / Light cues
One flash. A change of state.
See the light cue when the device sleeps or wakes.
WHITE / ONE FLASH
After about 5 minutes stationary.
The full ring flashes white once, then the LEDs turn off.
Product sound: one power-off tone.
GREEN / ONE FLASH
Move again, or press a button.
The full ring flashes green once when the device wakes.
Product sound: one power-on tone.
Select a state or replay the light cue.
Configure and inspect the device while safely parked.
Full instructions
The motion sensor monitors whether the vehicle is moving. After the vehicle has been stationary for about 5 minutes, the device enters sleep automatically: the full ring flashes white once, the power-off tone sounds once, and the LEDs then switch off. When the vehicle moves again or a device button is pressed, the device wakes: the full ring flashes green once and the power-on tone sounds once. Timing may vary slightly with firmware.
To switch off manually, press and hold the right button for about 5–7 seconds until the ring flashes white and the power-off tone sounds.
S1 / 10
Charging
Charge with a 5 V DC, 1 A power supply and an undamaged USB-C cable.
5 V DC / 1 AUSB-C connectionDry, undamaged equipment Dashboard mount / visual guide
A closer look at the connection.
Use the socket on the side of the dashboard charging mount. Check the plug direction before inserting it.
Connect the cable
Align the USB-C plug with the socket on the side of the mount. Insert straight along the socket axis; do not push it in at an angle.
Check the assembly
Check that the device sits securely and the connection is not under strain. Route the cable clear of controls. Mounting alone does not confirm an app or location connection.
Full instructions
Charge the device with a 5 V DC, 1 A power supply and an undamaged USB-C cable. At low battery, the full ring flashes red once every 4 seconds and the low-battery tone sounds once with each flash. Stop safely and charge the device as soon as possible.
S1 / 11
Speed-camera alerts
When a fixed or mobile speed camera is ahead, the app sends an alert to the device via BLE.
Blue light
Camera ahead
A fixed or mobile speed-camera alert is ahead. Check your speed and the road signs.
3 full-ring flashes3 warning tones Illuminated snapshot · not continuously lit
Full instructions
When a fixed or mobile speed camera is ahead, the app sends an alert to the device via BLE. The warning distance is calculated from service data, the road speed limit, the vehicle's location, and current driving conditions. The app clears the alert after the point has been passed.
Press the right button once to confirm a correct alert; press the left button once to report an incorrect or no-longer-valid alert.
S1 / 12
Road-safety alerts
Alerts are advisory only and conditions can change. Always watch the road and follow signs and instructions at the scene.
Yellow light
Road hazard
A reported road-safety event is ahead, such as roadworks, an accident or a broken-down vehicle. Stay attentive.
3 full-ring flashes3 warning tones Illuminated snapshot · not continuously lit
Full instructions
The app sends a corresponding alert when there is a traffic accident, roadworks, a broken-down vehicle, a school zone, traffic congestion, or another hazard ahead.
Press the right button once to confirm a correct alert; press the left button once to report an incorrect or cleared hazard.
S1 / 13
Speeding alerts
The device issues a speeding alert when the current speed supplied by the phone reaches the configured warning threshold.
Red light
Speed reminder
Your speed reaches the configured warning threshold. Check your speed and the posted limit.
3 full-ring flashes3 warning tones Illuminated snapshot · not continuously lit
Full instructions
If no tolerance has been set in the app, the threshold is based on the current road speed limit. If a tolerance has been set, the threshold is calculated as follows:
- No tolerance set: threshold = road speed limit
- Fixed tolerance set: threshold = road speed limit + fixed value
- Percentage tolerance set: threshold = road speed limit + road speed limit × percentage
S1 / 14
Multiple simultaneous alerts
If two or more alerts occur at the same time, the device cycles through the corresponding LED and sound signals in the order determined by the system.
Full instructions
If two or more alerts occur at the same time, the device cycles through the corresponding LED and sound signals in the order determined by the system until the app clears each alert.
Light signals
This page does not play sound. Repeating signals play for two cycles; select a state to replay.
S1 / 15
App settings
Alert switches, output methods, volume, units, and tolerance can all be configured in the app.
Full instructions
- Enable or disable speed-camera, road-safety, and speeding alerts.
- Choose separately whether alerts are output on the device, played through the phone, and shown on the map.
- Adjust the device alert volume; phone volume is controlled by the phone.
- Set speed and distance units and the speeding tolerance.
- View the device name, device ID, connection status, battery level, and version information, and remove a connected device.
- Use the map to view the current position, route, traffic conditions, and hazards along the route.
- Adjust available LED settings (subject to the current app and firmware version).
S1 / 16
Troubleshooting
Device won't switch on, app can't find it, no alert sound — start here.
QUICK CHECK
Check each item while safely parked. This checklist does not test your device.
Not found? Start here.
S1 / DRIVONA
If it keeps disconnecting, allow background operation and check data and location access.
Check the alert path.
S1 / DRIVONA
If the issue continues after these checks, contact support.Full instructions
Device does not switch on
connect it to a 5 V DC, 1 A supply and charge for at least 30 minutes, then try again. Check the power supply and USB-C cable.
App cannot find the device
make sure the device is on and close to the phone; enable Bluetooth, location, and nearby-device permissions. Add the device from within the Drivona app rather than pairing only in the phone's Bluetooth settings.
Frequent disconnections
allow background operation, disable battery optimisation for the app, and check the data and location connections. If necessary, remove the device in the app and add it again.
Low-battery warning continues after charging
stop using the device and contact support.
No alert sound or LED signal
check that the relevant alert is enabled, device alerts are allowed, the device volume is not too low, and the device is connected to the app.
Alert location or speed limit is inaccurate
alerts depend on phone location, connectivity, maps, and third-party databases and may be delayed or incomplete. Follow roadside signs and actual conditions, and use the report buttons only when safe.
S1 / 17
Driving safety
The driver must always obey road signs, speed limits, traffic laws, and instructions given at the scene.
Choose a secure position that keeps your view, airbags and vehicle controls clear.Complete setup while safely parked.
Park first. Set up once.
Finish installation and connection before you start driving.
- Keep the road and instruments visible.
- Keep airbags and vehicle controls clear.
- Check that the device is secure.
Full instructions
- Complete installation, connection, and settings before setting off. Do not look at or operate the phone while driving, and do not stare at the device.
- Secure the device and cable so they do not obstruct the driver's view, instruments, cameras, sensors, airbags, or vehicle controls.
- Do not use the device on an aircraft unless permitted by the crew, or in areas where radio or electronic devices are prohibited.
S1 / 18
Product and battery safety
Keep away from children, high temperatures, and liquids; do not disassemble, crush, or modify the device or battery.
CARE / SAFETY
A little care. Every day.
01Disconnect power first.
Wipe gently with a soft, slightly damp cloth.
02Keep liquids away.
No confirmed water-resistance rating. Avoid rain, moisture and condensation.
03No harsh cleaning.
Do not use alcohol, solvents, abrasives, sprays or compressed air.
04Avoid heat and damage.
Keep away from heat. Do not disassemble, crush or modify the device.
Quick care summary. Read the complete product and battery safety instructions below.
Full instructions
- Keep the device out of reach of children under 3 years of age.
- Do not use, store, or charge it near naked flames, heaters, inside a sun-heated closed vehicle, or in other high-temperature environments.
- The device has no confirmed water-resistance rating. Keep it away from rain, liquids, moisture, and condensation.
- Do not disassemble, crush, puncture, impact, or modify the device or battery. Stop using it immediately if it is dropped, deformed, unusually hot, gives off an odour, or smokes.
- Do not clean with alcohol, solvents, ammonia, abrasives, aerosol sprays, or compressed air. Disconnect power and wipe with a soft, slightly damp cloth.
- If a serious incident involving the device occurs, contact the manufacturer, the retailer, and the competent local authority.
S1 / 19
Disposal and EU compliance
Contains a lithium-ion battery; do not burn or dispose of with household waste.
Full instructions
The product contains a rechargeable lithium-ion battery. Do not burn it or dispose of it with household waste. Follow local regulations and take the product to an appropriate collection point for electrical/electronic equipment and batteries, or return it to the retailer or manufacturer.
The manufacturer declares that radio equipment model S1 complies with the relevant requirements of the EU Radio Equipment Directive 2014/53/EU. The full EU Declaration of Conformity is available from the manufacturer or local distributor. CE, WEEE, and other markings are governed by the final production label and packaging.
S1 / 20
Technical specifications
The S1 has no display and communicates through the full LED ring and sound signals.
Product views
S1 Body profile
 Full instructions
| Product type | Live traffic, speed-camera, road-safety, and speeding alert device |
|---|
| Model | S1 |
|---|
| Wireless connection | Bluetooth Low Energy (BLE) |
|---|
| Operating frequency | 2402–2480 MHz |
|---|
| Rated input | 5 V DC, 1 A, USB-C |
|---|
| Battery | Built-in rechargeable lithium-ion battery, 3.8 V, 800 mAh |
|---|
| Operating temperature | -10 °C to 40 °C |
|---|
| Sensor | Motion sensor |
|---|
| Visual and audible indication | full-colour LED ring; built-in buzzer |
|---|
| Controls | Left and right buttons |
|---|
| Compatible platforms | iOS and Android; see the app-store listing for minimum OS versions |
|---|
| In-car systems | Apple CarPlay and Android Auto |
|---|
| Display | None |
|---|
S1 / 21
Manufacturer and customer support
Contact the retailer or use the Contact Support option in the Drivona app.
Full instructions
Manufacturer: TechVanguard Systems GmbH
Address: Tölzer Str. 2, 82031 Grünwald, Germany
Email: Kontakt@techvsystems.de
Customer support: contact the retailer or use the Contact Support option in the Drivona app.


